How to Draw a Cute Cartoon Bunny? Beginners Guide
Step by Step Tutorial for Drawing cute Cartoon Bunny for Kids

This post will teach you how to draw a cute cartoon bunny in easy steps. All steps explained with step by step drawing images in order for you to reach your goal towards drawing a cartoon bunny in easy steps. So lets start drawing.
| Category | Details |
|---|---|
| Tools Used: | Pencil, A4 Paper, Eraser (Rubber). |
| Duration: | 5 to 13 Minutes |
| Difficulty: | Easy |
| For: | Kids, Beginners. |
| Suitable Ages: | 3 -11 |
Easy Way to Draw a Cute Cartoon Bunny – Simple steps
Step 1: Drawing the Rabbit’s Face
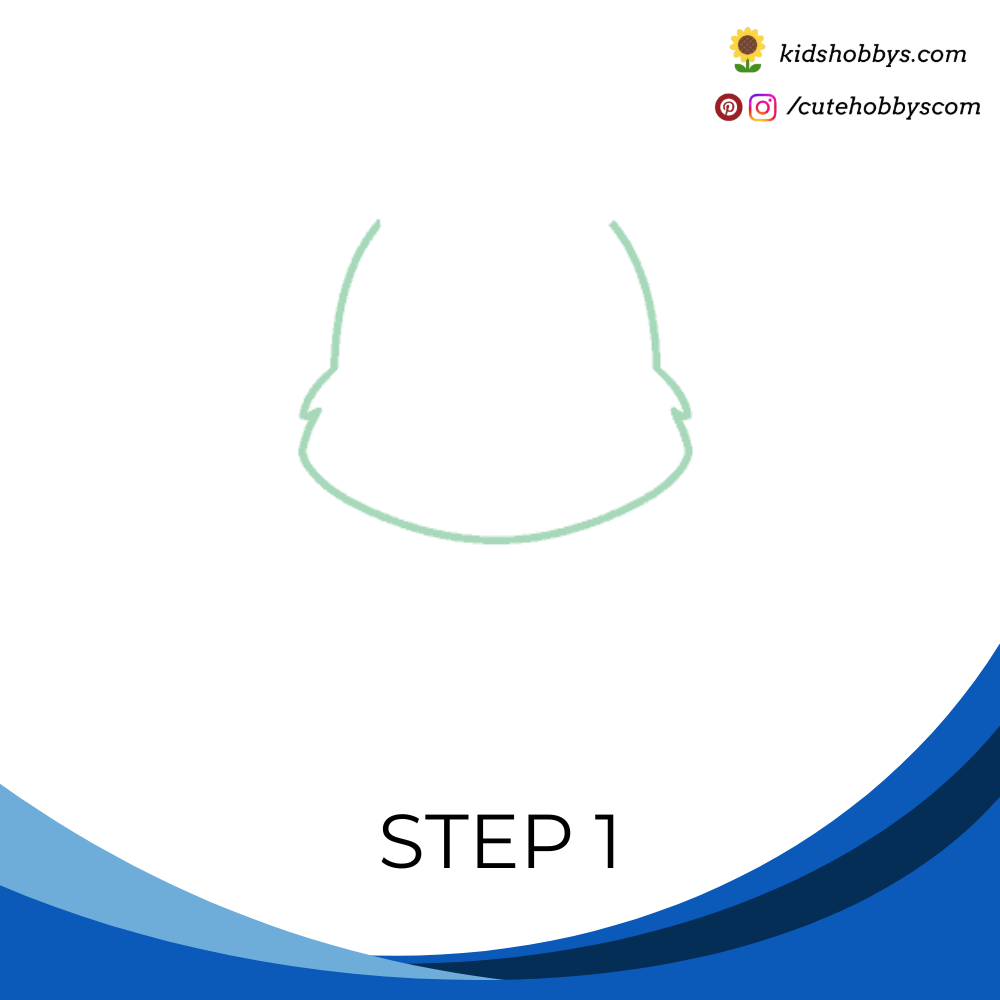
The rabbit’s face should be drawn first. A series of curved lines can be used to form the narrow sides of the head, the fluffy fur tufts, the chubby cheeks, and the chin.
Step 2: Sketching the Chest and Arm

Next, short curved lines that meet at gentle points should be drawn to create the fluffy fur on the rabbit’s chest.
A long curved line should then be extended and doubled back on itself to form the arm. Short lines can be added to define the paw.
Step 3: Drawing the Second Arm

The other arm should be drawn using overlapping curved lines. This arm should be bent at the elbow. Short lines can be used to add details to the paw.
Step 4: Outlining the Belly and Legs
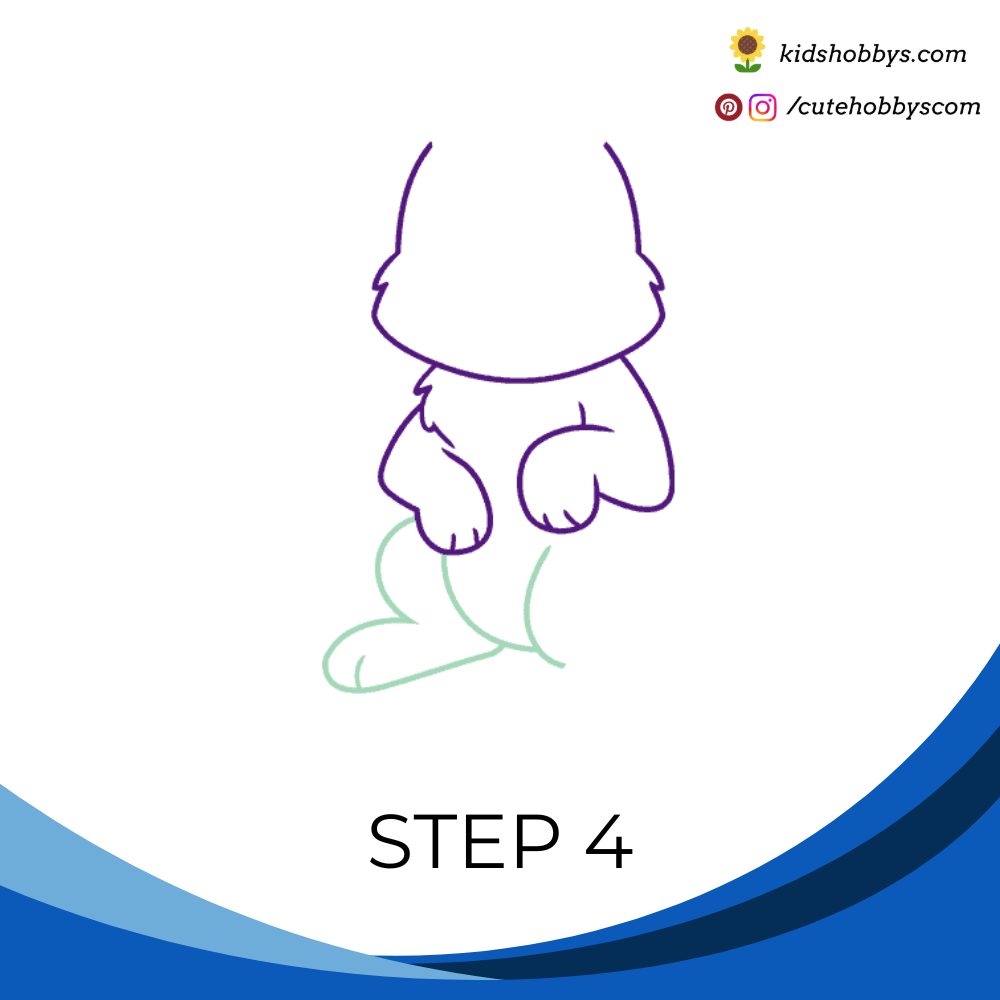
Overlapping curved lines should be used to sketch the rabbit’s belly and thigh. Then, curved lines should be drawn to form the back leg. Short curved lines will help detail the paw.
Step 5: Completing the Body and Tail
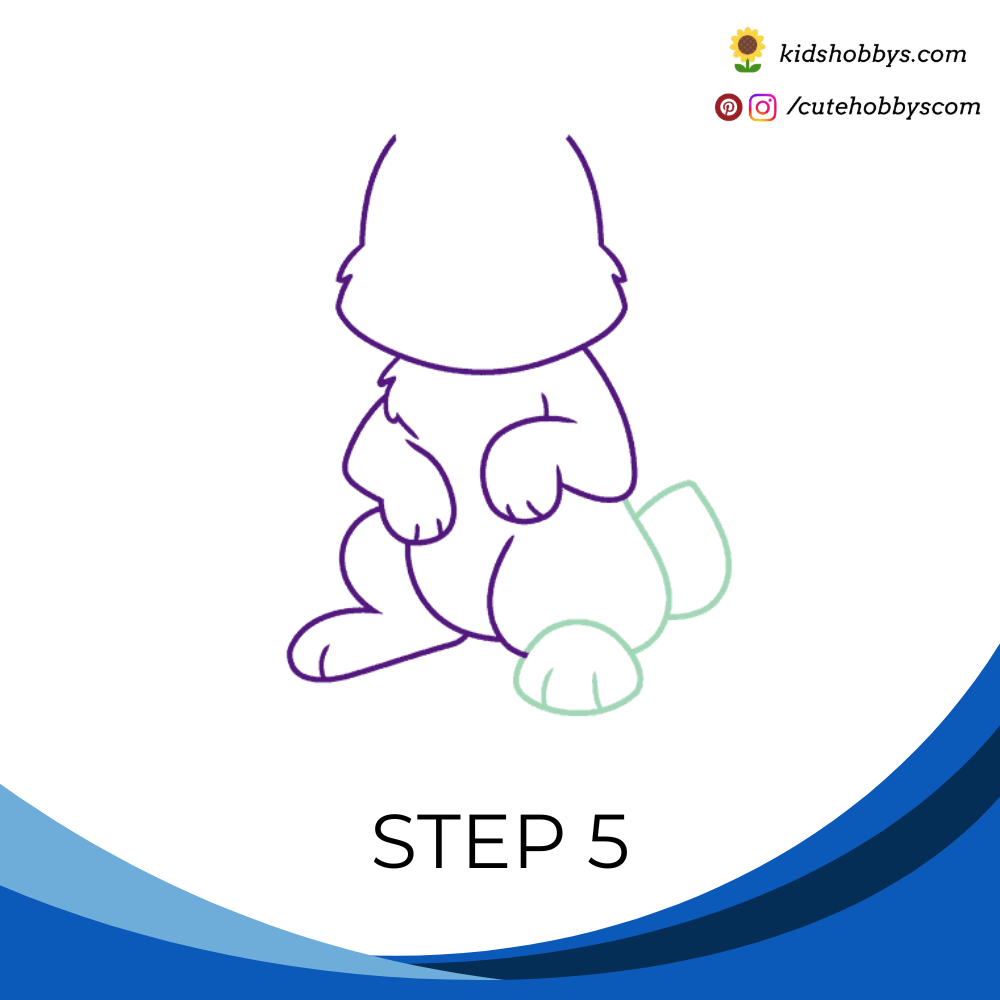
A rounded shape should be enclosed to form the other foot. Short lines can be added to define the toes.
A curved line should then be drawn between the arm and foot to complete the outline of the rabbit’s body. To form the fluffy tail, a partial teardrop shape should be enclosed.
Step 6: Drawing the Rabbit’s Eyes
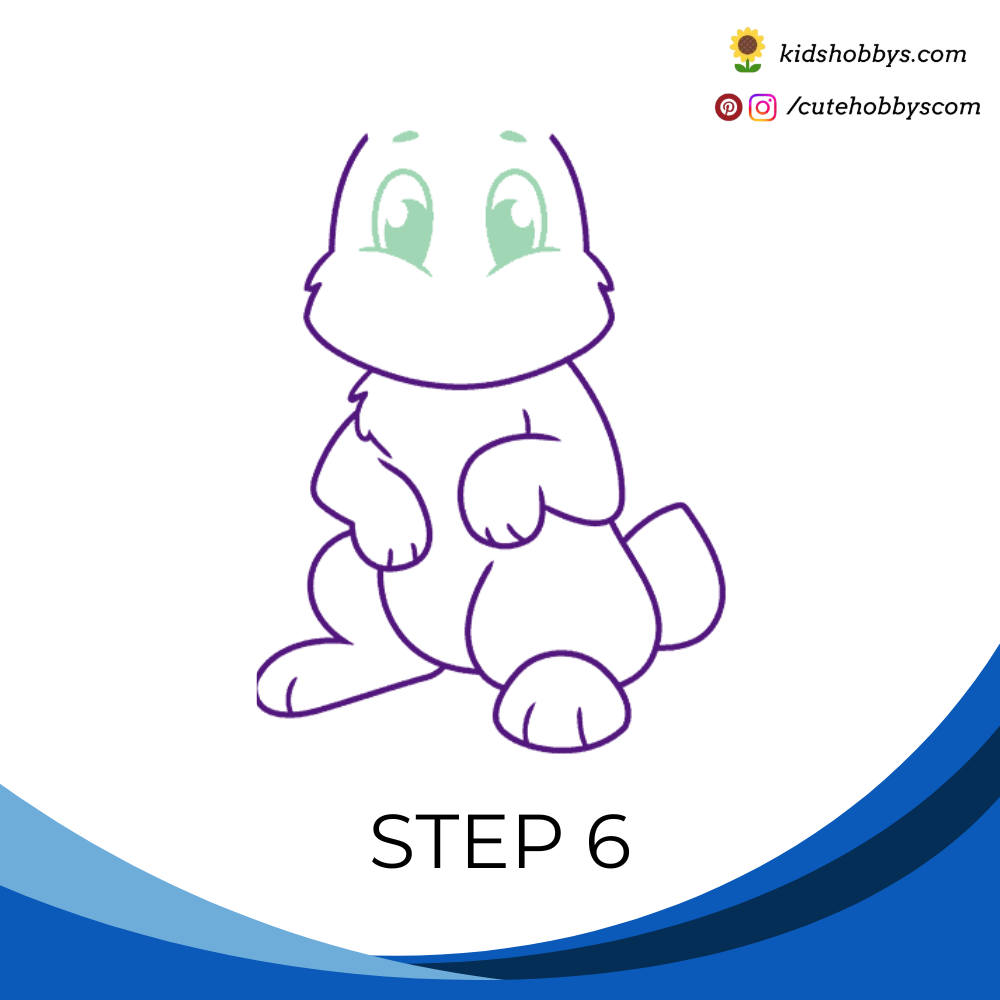
Two curved lines should be drawn to form the cheeks. Above them, partial oval shapes should be enclosed to create the eyes.
Inside each eye, two successively smaller ovals should be drawn. The space between them should be shaded to represent the pupils. A small oval above each eye should be shaded to indicate the eyebrows.
Step 7: Adding the Nose

A small, inverted triangle with rounded corners should be drawn in the center of the face to form the rabbit’s nose.
Step 8: Drawing the Mouth and Whiskers
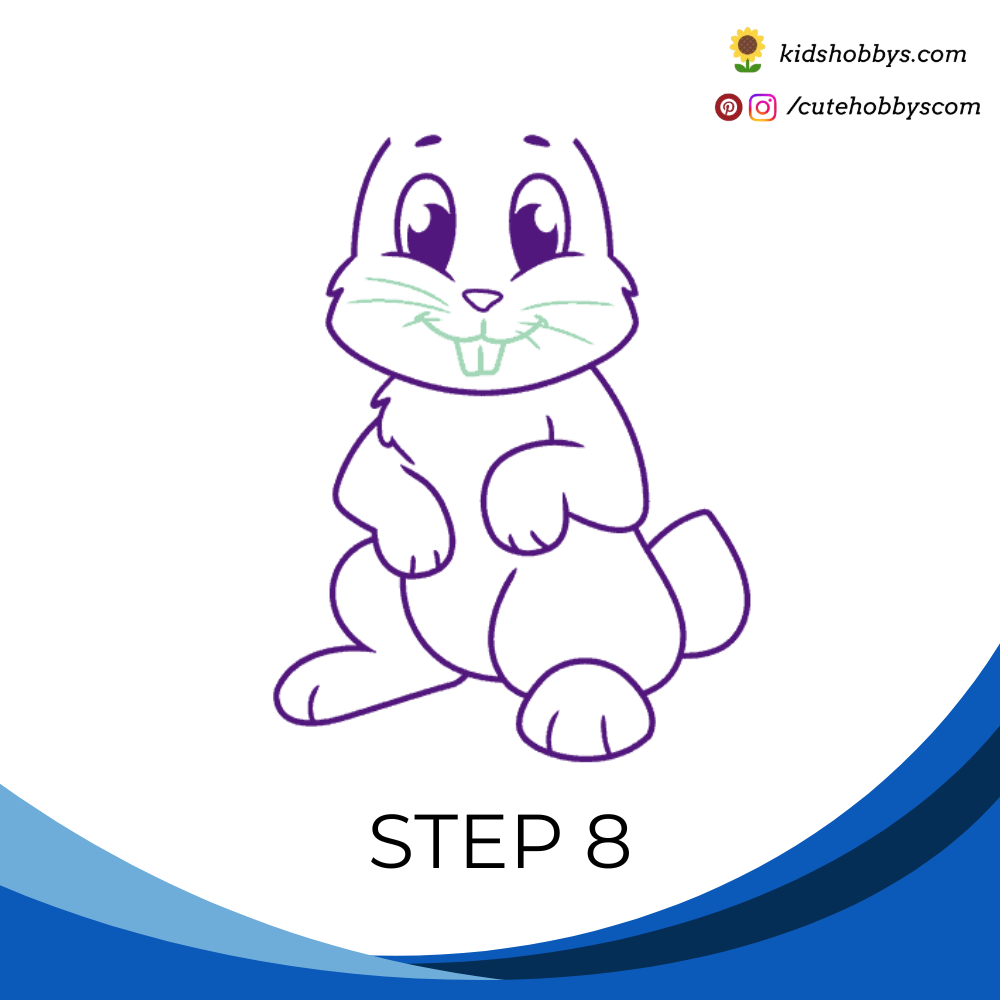
A wide, rounded “W” shape should be drawn below the nose to form the mouth. Beneath it, a rectangle shape should be enclosed, with a vertical line drawn down its center to create the rabbit’s prominent teeth.
Several curved lines should be extended from above the mouth to form the whiskers.
Step 9: Drawing the Ears
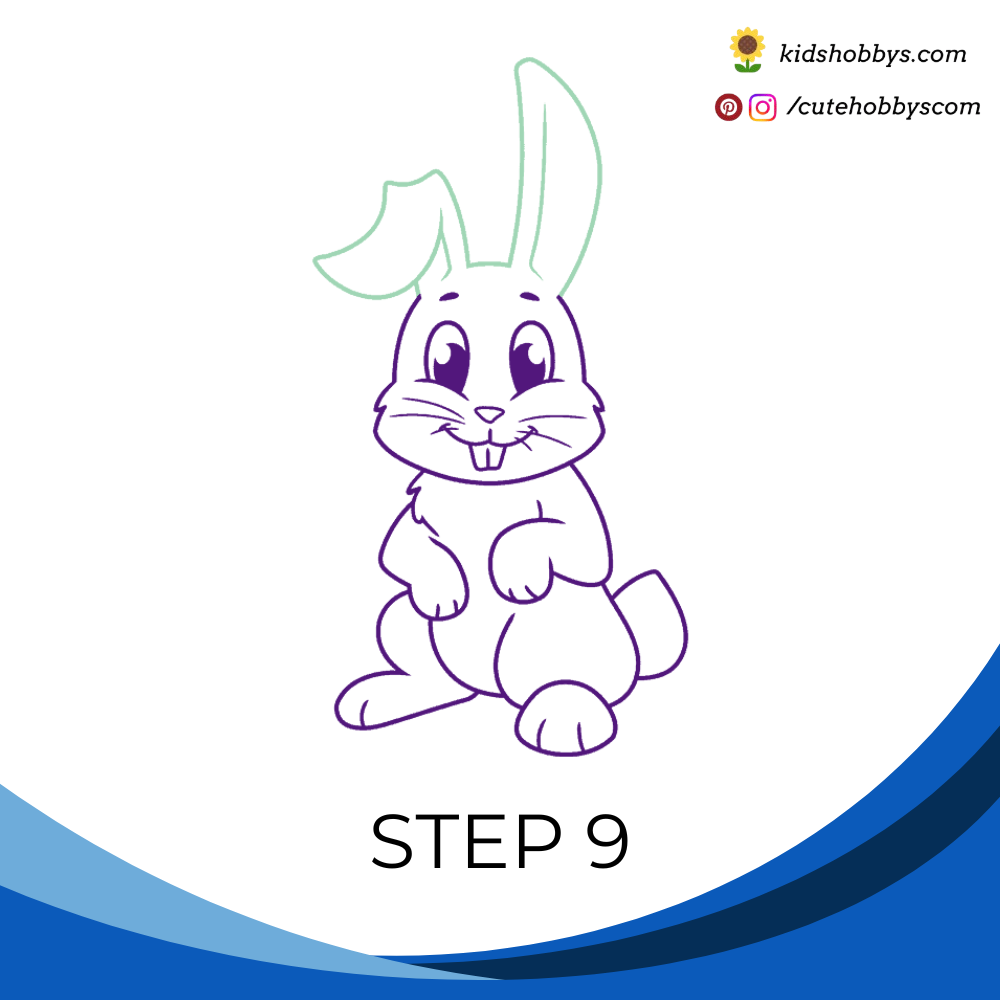
Finally, the rabbit’s ears should be outlined using curved lines. One ear should be floppy and bent, which will require overlapping lines. Additional curved “L”-shaped lines should be drawn inside each ear to add detail.
Conclusion
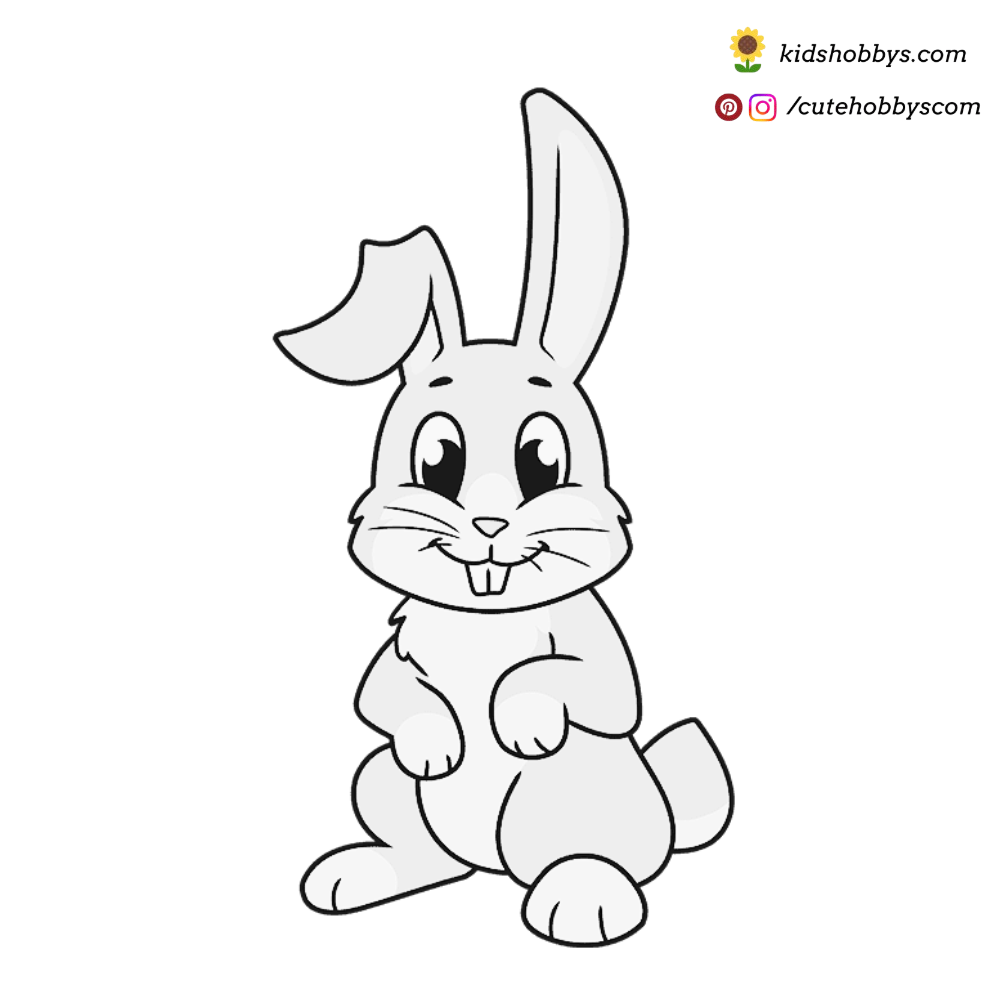
By following these simple steps, a cartoon rabbit can be drawn with a cute and lively appearance. Starting with basic shapes and gradually adding details ensures that the drawing is well-formed. With practice, drawing rabbits will become even easier and more fun! For more interesting articles, visit Kidshobbys.com
Drawing References:
- Referred from the youtube video named How To Draw A Rabbit Easy || rabbit bunny drawing || Drawing for kids || from Drawing Idea youtube channel.
- Referred from the youtube video named How to Draw a Cute Rabbit Easy Step By Step from Cute Easy Drawings youtube channel.


