How to Draw a Cute Cartoon Dolphin Using Pencil for Kids?
Step by Step methods to Draw a Cute Cartoon Dolphin using Pencil as a Sketch for kids and beginners.

In this tutorial, I’ve posted the step by step methods to draw a cute cartoon dolphin using pencil as a sketches. This tutorial can be suitable for the kids, beginners, starters and who are all willing to learn pencil sketching in quick ways.
| Category | Details |
|---|---|
| Tools Used: | Pencil, A4 Paper, Eraser (Rubber). |
| Duration: | 10 to 15 Minutes |
| Difficulty: | Medium |
| For: | Kids, Beginners. |
| Suitable Ages: | 3 -10 |
Step 1: Drawing the Dolphin’s Face
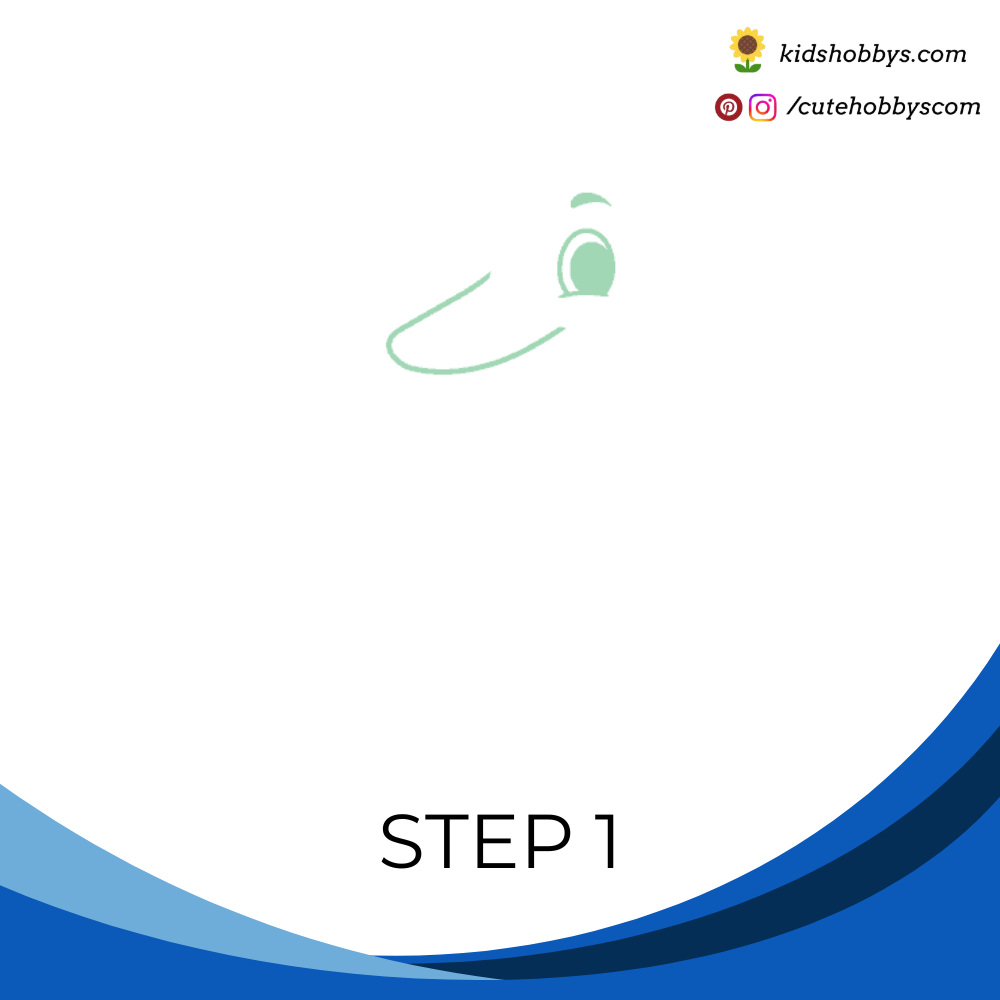
Start by drawing the dolphin’s face. Use a “U” shaped line to create the top part of its mouth. Then, draw an oval-shaped eye using curved lines. Inside the eye, shade a small circle to form the pupil.
Step 2: Adding the Lower Jaw and Mouth Details
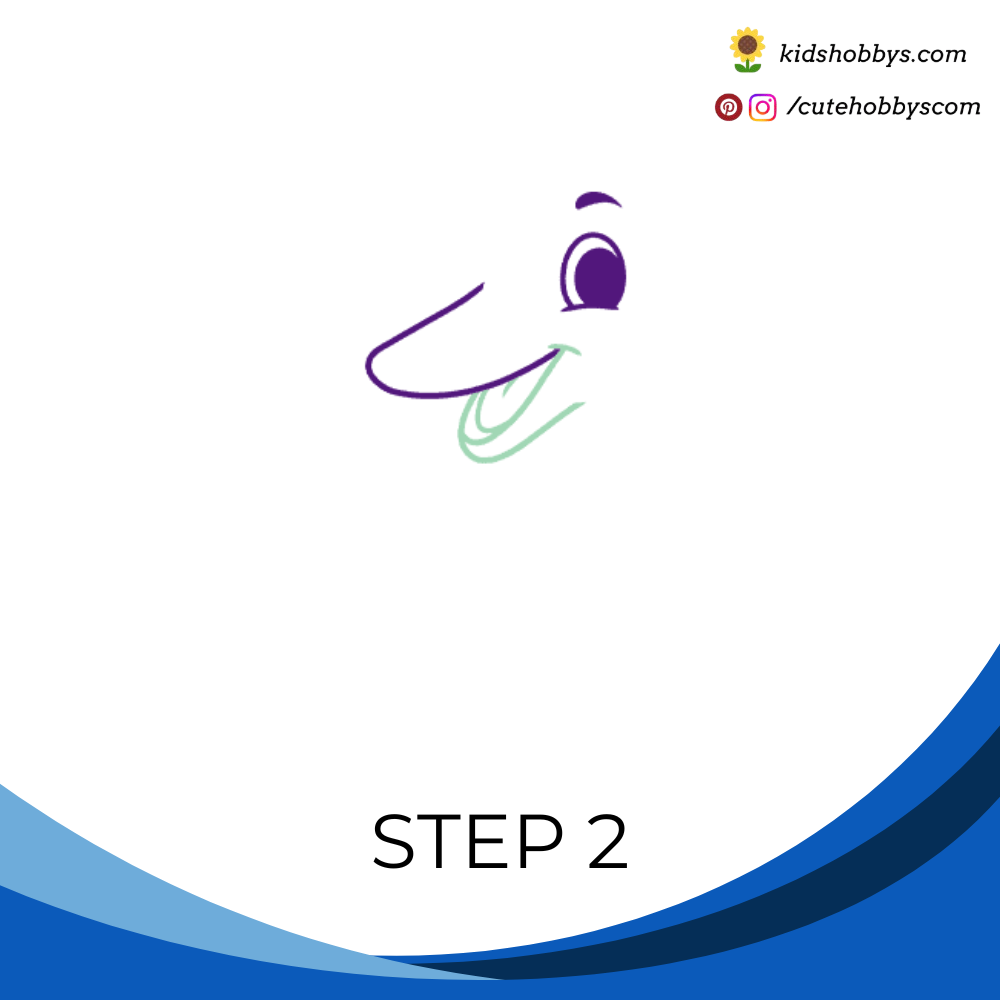
Draw another “U” shaped line below the first one to make the lower jaw. Inside the mouth, use curved lines to draw the tongue, the corner of the mouth, and the crease of the tongue.
Step 3: Outlining the Dolphin’s Body
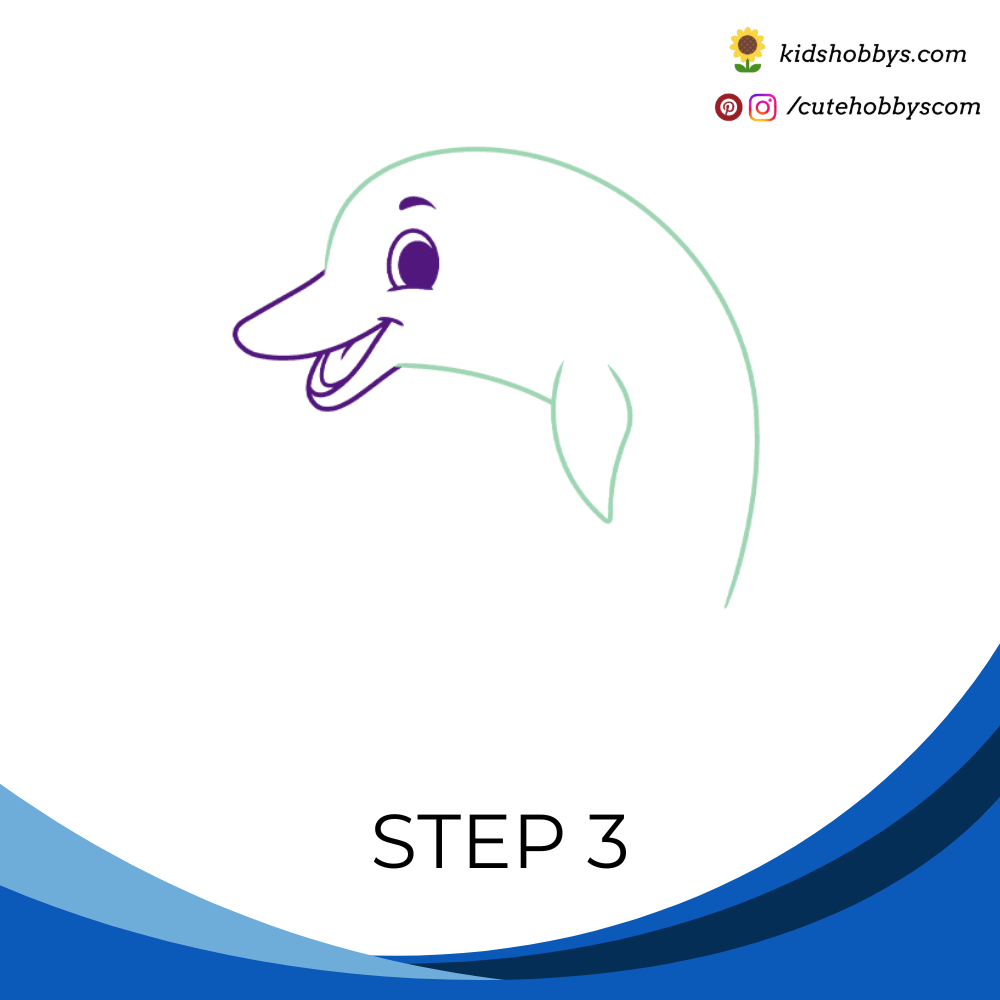
To shape the dolphin’s body, draw a long curved line from the top of its head (called the melon) to its back. Then, use a shorter curved line to create the belly. Next, draw a curved line on the side and double it back to form the front fin, also called the pectoral fin.
Step 4: Drawing the Dorsal Fin and Tail
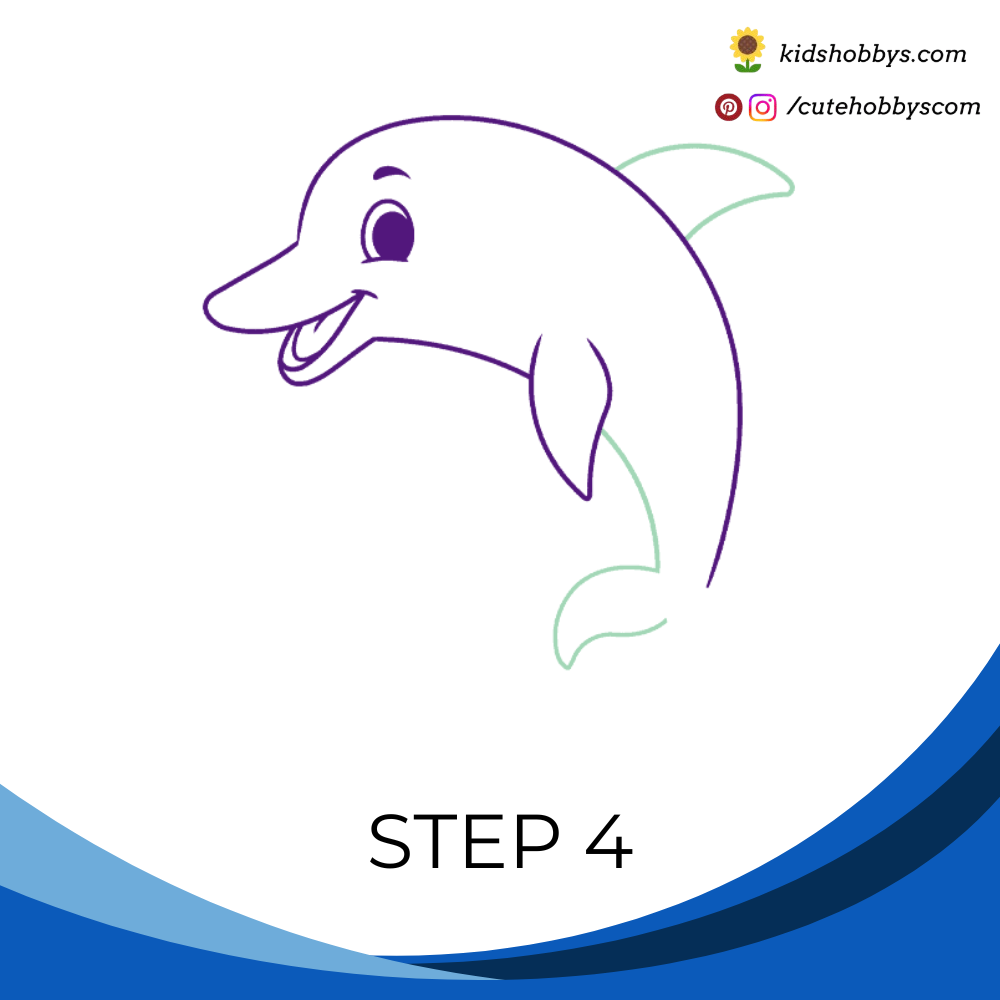
From the dolphin’s back, extend a curved line and loop it back to make the dorsal fin. Continue drawing the belly line on the opposite side of the fin. At the end of this line, create another curved line, bending it back to form the first half of the tail.
Step 5: Completing the Tail and Adding the Other Fin
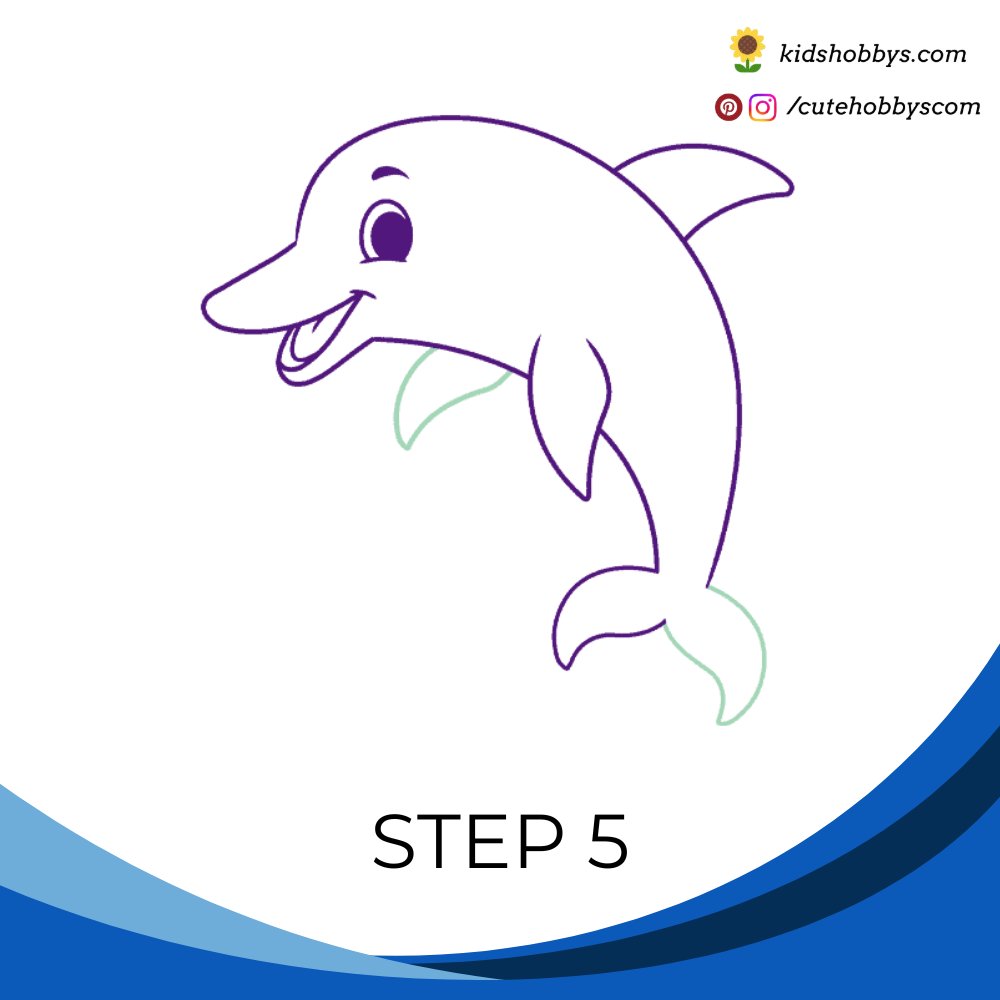
To finish the tail, draw another curved line and loop it back. Then, add the second pectoral fin by drawing a curved line from the belly and folding it back on itself.
Step 6: Adding Details to the Belly and Water Splashes
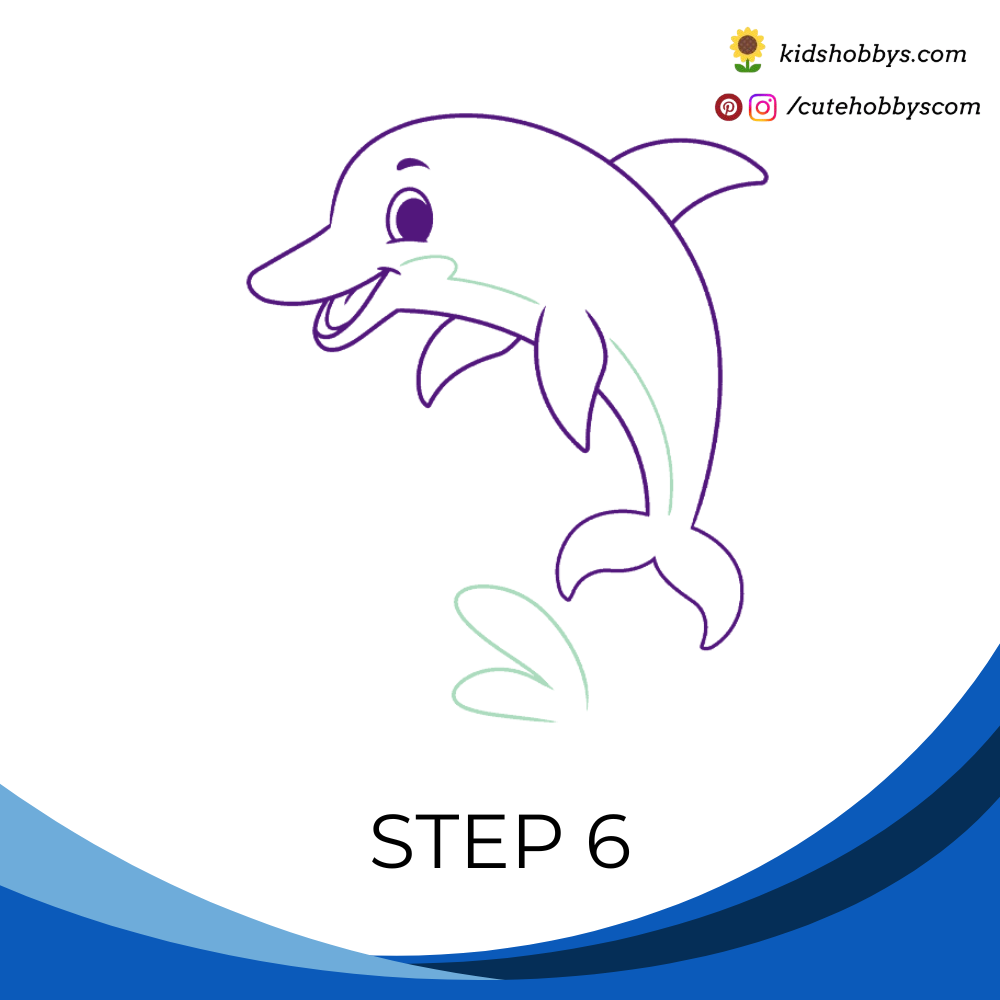
Draw a curved line along the belly to add some details. Then, sketch the splashing water by drawing curved lines that loop back, forming waves beneath the dolphin.
Step 7: Finishing the Water Splash

Continue drawing curved lines of different lengths to complete the shape of the water splashing.
Step 8: Drawing the Ocean Waves
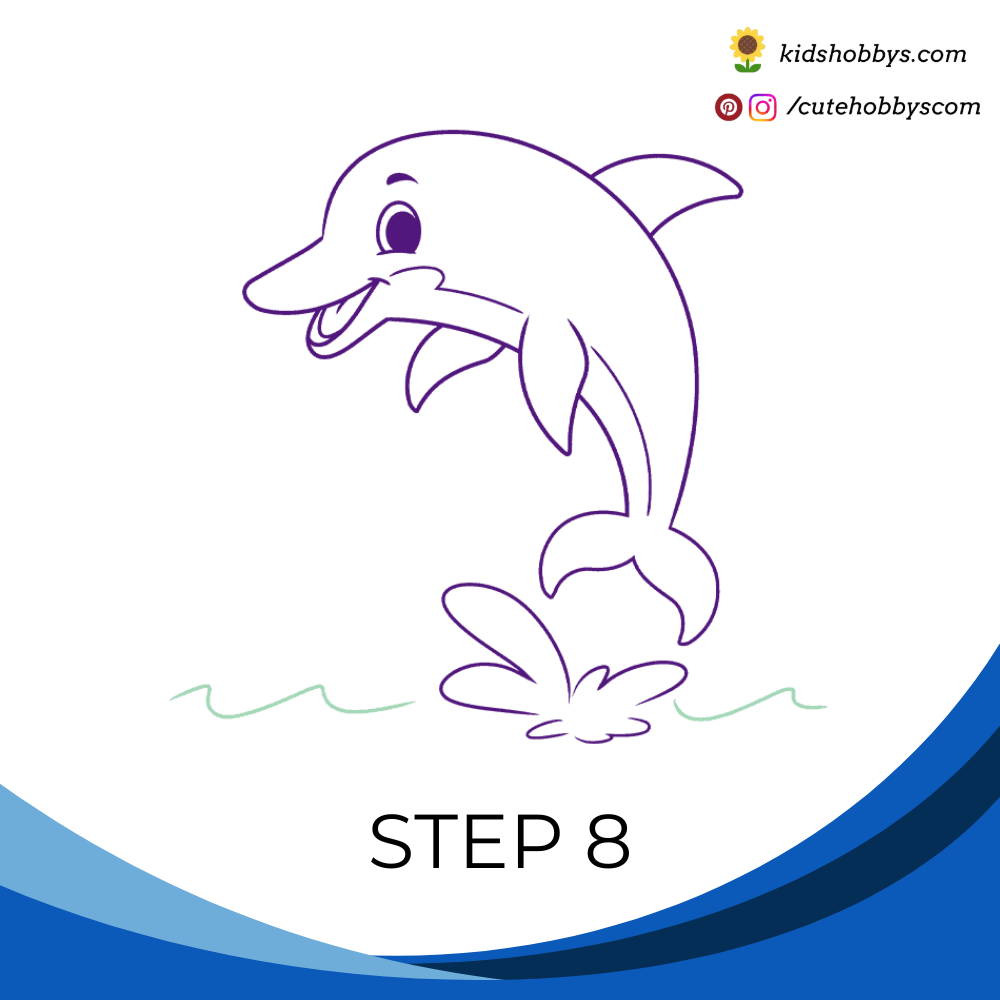
Finally, use wavy lines with soft peaks to create the ocean waves around the dolphin.
Step 9: Complete the Cute Cartoon Dolphin:
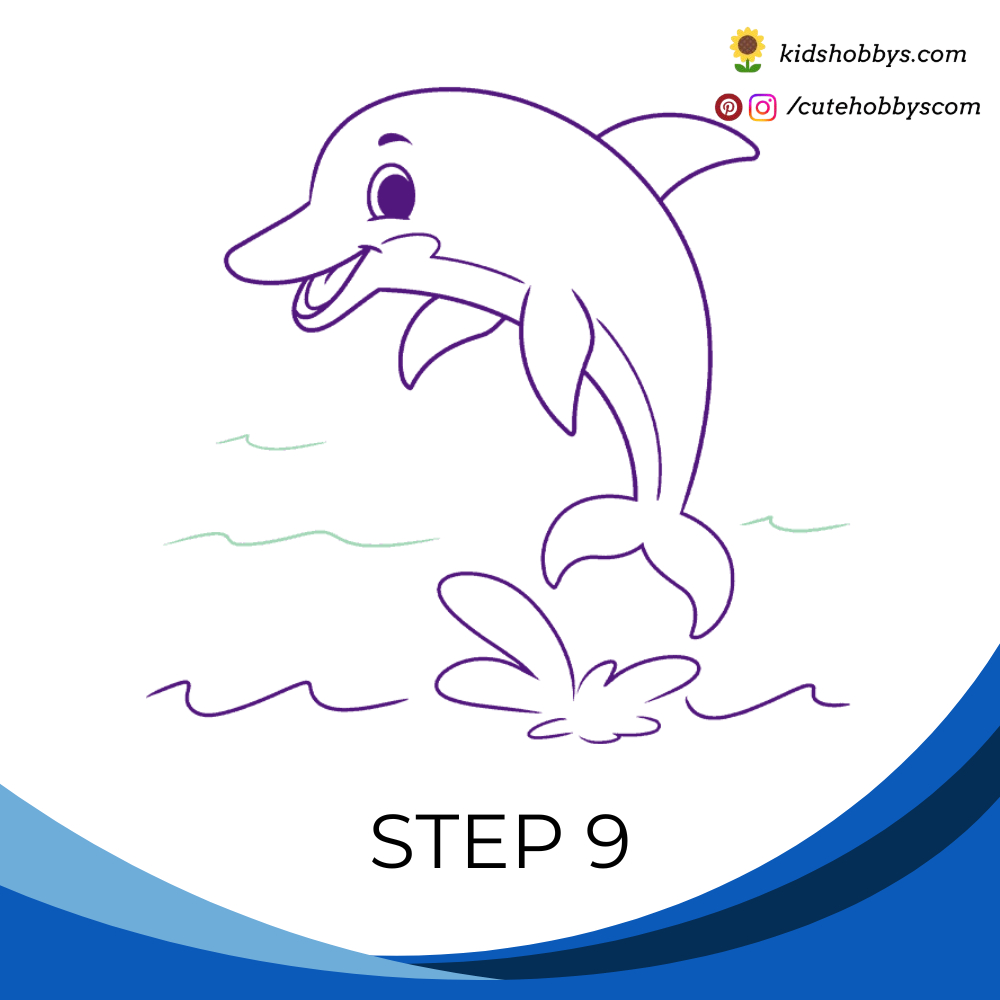
Finnish the drawing by adding more waves
Step 10: Color your sketch
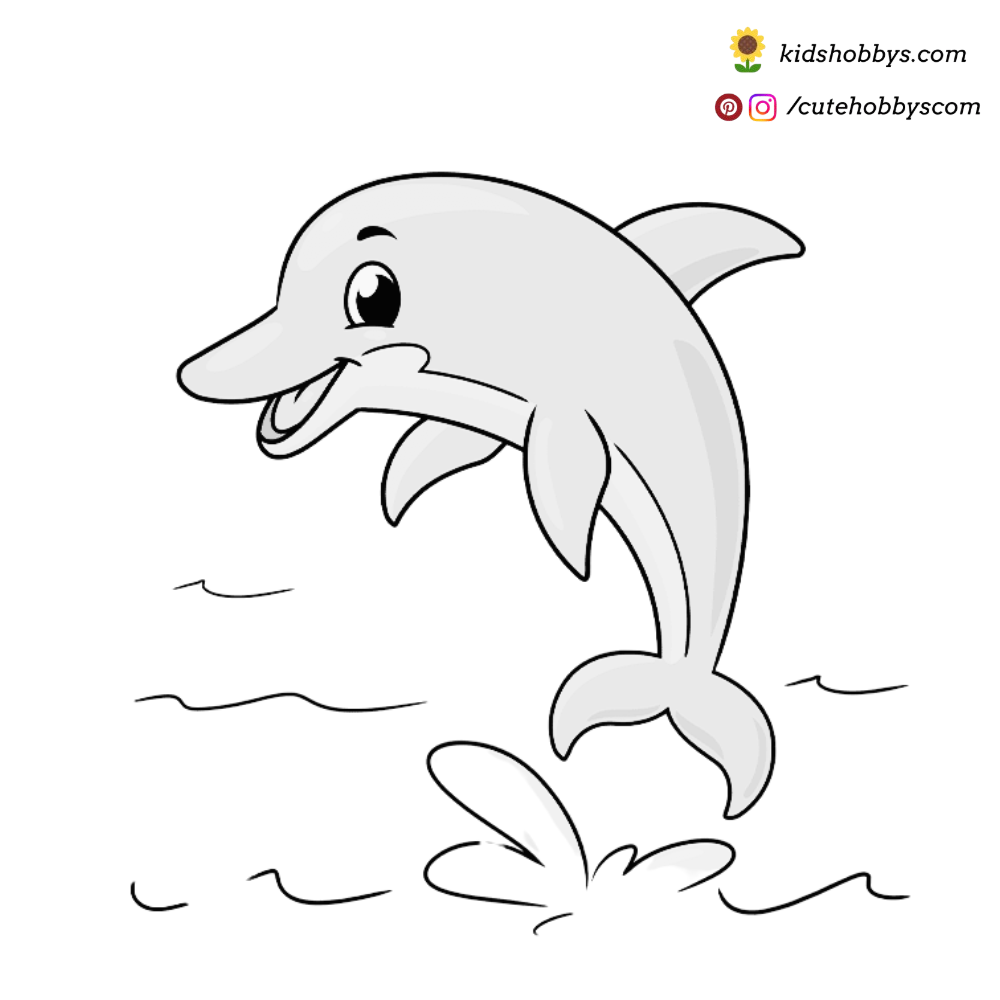
That’s it, Kids. You have learned to draw a cute dolphin with in less than 10 steps. You can save the above image and color it as your need. For more interesting articles, visit Kidshobbys.com.
Drawing References:
- I have referred an youtube video to complete the above dolphin pencil sketches.


